Programming Arduino Pro Mini with USBasp V2.0
UPD 2016-05-14: Arduino Nano with CH340 ships from Aliexpress for less than $2 – I recommend you buy it instead (unless you know what you’re doing).
Do you really need to pay $25 for an Arduino? Many of my friends have the original Arduino and they work great, but I wanted to see how cheap I can go. Initially, I purchased the SunFounder Starter Kit and it worked 100% as advertised. Today we’ll see if we can get a fully featured Arduino under $5.
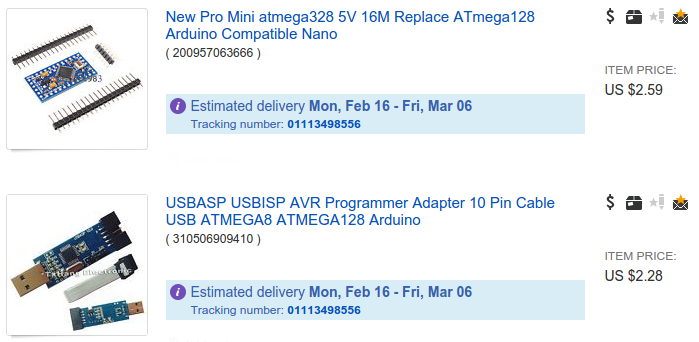
Recently, I came across the dirt cheap Arduino Pro Mini clones and decided to buy one to see if it works! I also got the clone of the USBasp programmer:
Finally, I had some time during the semester break to play with it. Below you will find the steps I had to follow to program the Pro Mini from Arduino IDE.
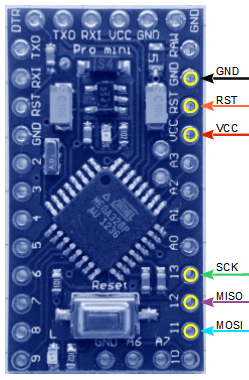
First, you’ll need to solder the pins onto the Pro Mini. I wanted to save some space and soldered the side pins to the bottom side. As a result, the board doesn’t fit into the breadboard perfectly. So if you intend to use it mostly in a breadboard, take this into consideration. Additionally, some pins are duplicated, so you might not need to solder some pins at all.
Next step is to insert Pro Mini into the breadboard as well as wire the IDC-10 pins (see the pinout labeled as Kabel).
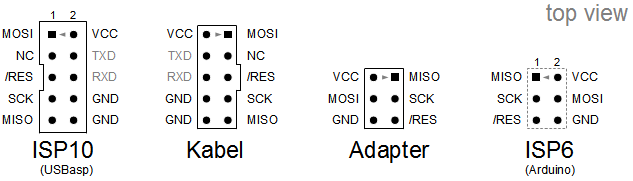
Source: USB ISP Programmer für Atmel AVR (USBASP)
After plugging the USBasp into the USB port, you should see the blinking LED (programmed into Pro Mini at the factory) and the VCC should output the correct voltage (3.3V or 5V, depending on your version of Pro Mini):

Without the load (Pro Mini), USPasp outputs proper 5.00V
Finally, the computer part (I use Ubuntu 14.04 LTS). If you use Windows, get the driver from the USBasp page. Change the following settings in the Arduino IDE:
- Under Tools > Programmer, select USBasp.
- Under Tools > Board, select your version of Arduino Pro or Pro Mini.
Finally, you need to update your udev rules, otherwise you’ll run into permission issues (more rules in Arch Wiki):
$ cat /etc/udev/rules.d/41-arvdude.rules
# USBasp Programmer rules http://www.fischl.de/usbasp/
SUBSYSTEMS=="usb", ATTRS{idVendor}=="16c0", ATTRS{idProduct}=="05dc", GROUP="andrew", MODE="0666"
Now, load a sample sketch under File > Examples > 01. Basics > Blink and then use Upload Using Programmer. If you don’t see any errors, congratulations! You might still encounter a warning similar to this:
avrdude: warning: cannot set sck period. please check for usbasp firmware update.
It can be resolved by reprogramming the programmer itself, as described in the article How to Update the Firmware on a USBasp V2.0. You will need another programmer for this, however.
If you are excited to continue hacking, but still looking for some inspiration, check out these resources:
- http://www.instructables.com/
- http://makezine.com/projects/
- http://hackaday.io/
- http://dangerousprototypes.com/
- https://courses.cit.cornell.edu/ee476/ideas/EE476.project.ideas.html
- http://habrahabr.ru/hub/arduino/ (in Russian)
Comments